How to Install Windows 7 Step by Step Guide
 |
| Window 7 Installing |
After Windows XP, Windows 7 operating system has become a favorite of people, many of its features make it more than Windows XP, so let's know Microsoft operating systems windows 7 step by step install How to do it -
You will need a Windows 7 bootable disk to install Windows 7 if you have it, then you will be able to install Windows 7 on your computer. Microsoft has given Windows 7 its demo on its official site to bring people in between. You can download the official Windows 7 SP1 ISO by visiting the Microsoft site.
Step-1: Select Boot Menu

To install windows 7 first, set the computer to boot from the CD / DVD. For this, restart/press the computer and press F2 from the keyboard and set your CD / DVD Device as 1st Boot Device in the set the order. Restart the computer now by pressing F10.
Step-2: Isert Window Disk

At the time of restart, insert the Windows XP bootable disk into your DVD ROM.
Step-3: Press any key boot from cd or DVD

Press any button from the keyboard when it is written.
Step-4: Window Files Loading

Windows is loading files, this is the necessary setup file copy from the DVD. It takes a few minutes.
Step-5: Select Language kr Time

After some time, your language, time & currency format, keyboard or input method is asked, if you select Hindi in language, you will see a lot of windows 7 hindi.
Click on it and select Next.
Step-6: Window 7 Install

Now you will see a Windows 7 install now window Click here to install now.
Step-7: Accept The License
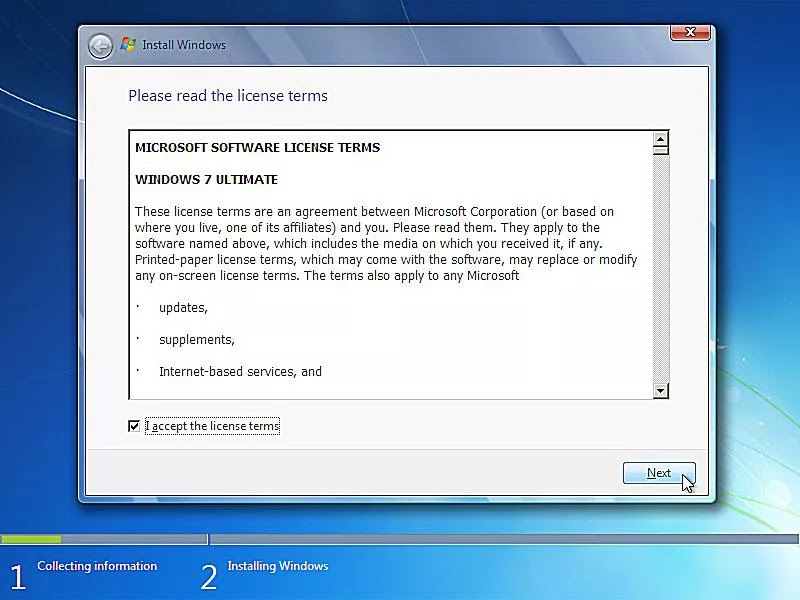
After this, windows 7 license terms will come, tick this I accept the license terms and continue.
Step-8: Select Window Option Custom

In this next window, the option of Upgrade and Custom (Advanced) will come. If Windows XP is already installed on your computer and you want to upgrade to Windows 7, then click on the upgrade and if you want to install just new windows 7, then click on Custom, click on it from your old Windows XP Will be safe in your computer.
Step-9: Select The Partition

On the Custom (advanced) you will be asked to partition your hard disk in which you want to install windows 7. If you want to format the partition, click on the disk option. If not, then select the partition and click Next.
Step-10: Window Installing

For a while, leave the computer as long as it does not restart. This will start the installation of Windows. It can take 5-10 minutes.
Step-11: Wait While Your Computer will Restart Automatic

After the restart of the computer, there will be some more process, but you do not have to do anything in it, it will be done manually by windows.
Step-12: Just Wait for Windows 7 Setup to Begin Again

You have not to need to do something window will be finished automatically.
Step-13: Windows 7 Setup to Update Registry Settings

Now Windows 7 Setup is Updating Registry Settings.
Step-14: Setup is starting services

Step-15: Window 7 Setup Complete

Step-16: Your Sytem Will Restart wait for this

Step-17: Preparing For First Use

Step-18: Checking Video Performance

Setup will check the performance of video.
Setup-19: Choose a Username or Computer Name or Password


After some time the user name and password will be asked. Fill it upwards and do it next
Step-20: Insert Windows Product key

Step-21: Select the Windows Update Option

Click on yes recommended settings.
Step-22: Correct Your PC Time and Date

Select Your Pc Time and date or Select Country in Time Zone.
Step-23: Select Your Computer Location

Select Your Computer Location if you are at home then select Home, if at work then select at work or if at public select public.

Step-24: Preparing Desktop

This will take few seconds to prepare Desktop wait for this.
Step-25: Your Pc is Ready

Your Pc Window is Now Complate.